Getting started
Thora organises quality work around one idea: the record is built as the work happens, not assembled afterwards. Everything below follows a single flow — set up the job, inspect it, close what fails, export the proof.
There are three roles in the app, and this guide covers all of them:
- Admins can do everything managers can, plus manage the team — inviting people and setting each person’s role.
- Managers run projects day to day: set up phases and locations, build inspection templates, review submitted work, validate fixes, and export reports.
- Inspectors see the projects assigned to them, complete inspection forms in the field, and resolve deficiencies raised on their work.
You sign in with the email and password your admin created for you. There is no self-registration — access is deliberately controlled per project.
Put it on the phone
Thora runs in the phone’s browser — there is nothing to download from an app store. To make it feel like a normal app:
- Open your Thora address in the phone browser and sign in.
- Use the browser’s Add to Home Screen option (in the share or menu button).
- Launch it from the new home-screen icon from now on — it opens full-screen and keeps working through signal dead zones.
Do this once per device during onboarding, before crews are on site. It takes thirty seconds and removes the “which website was it again?” problem forever.
Set up a project (admins & managers)
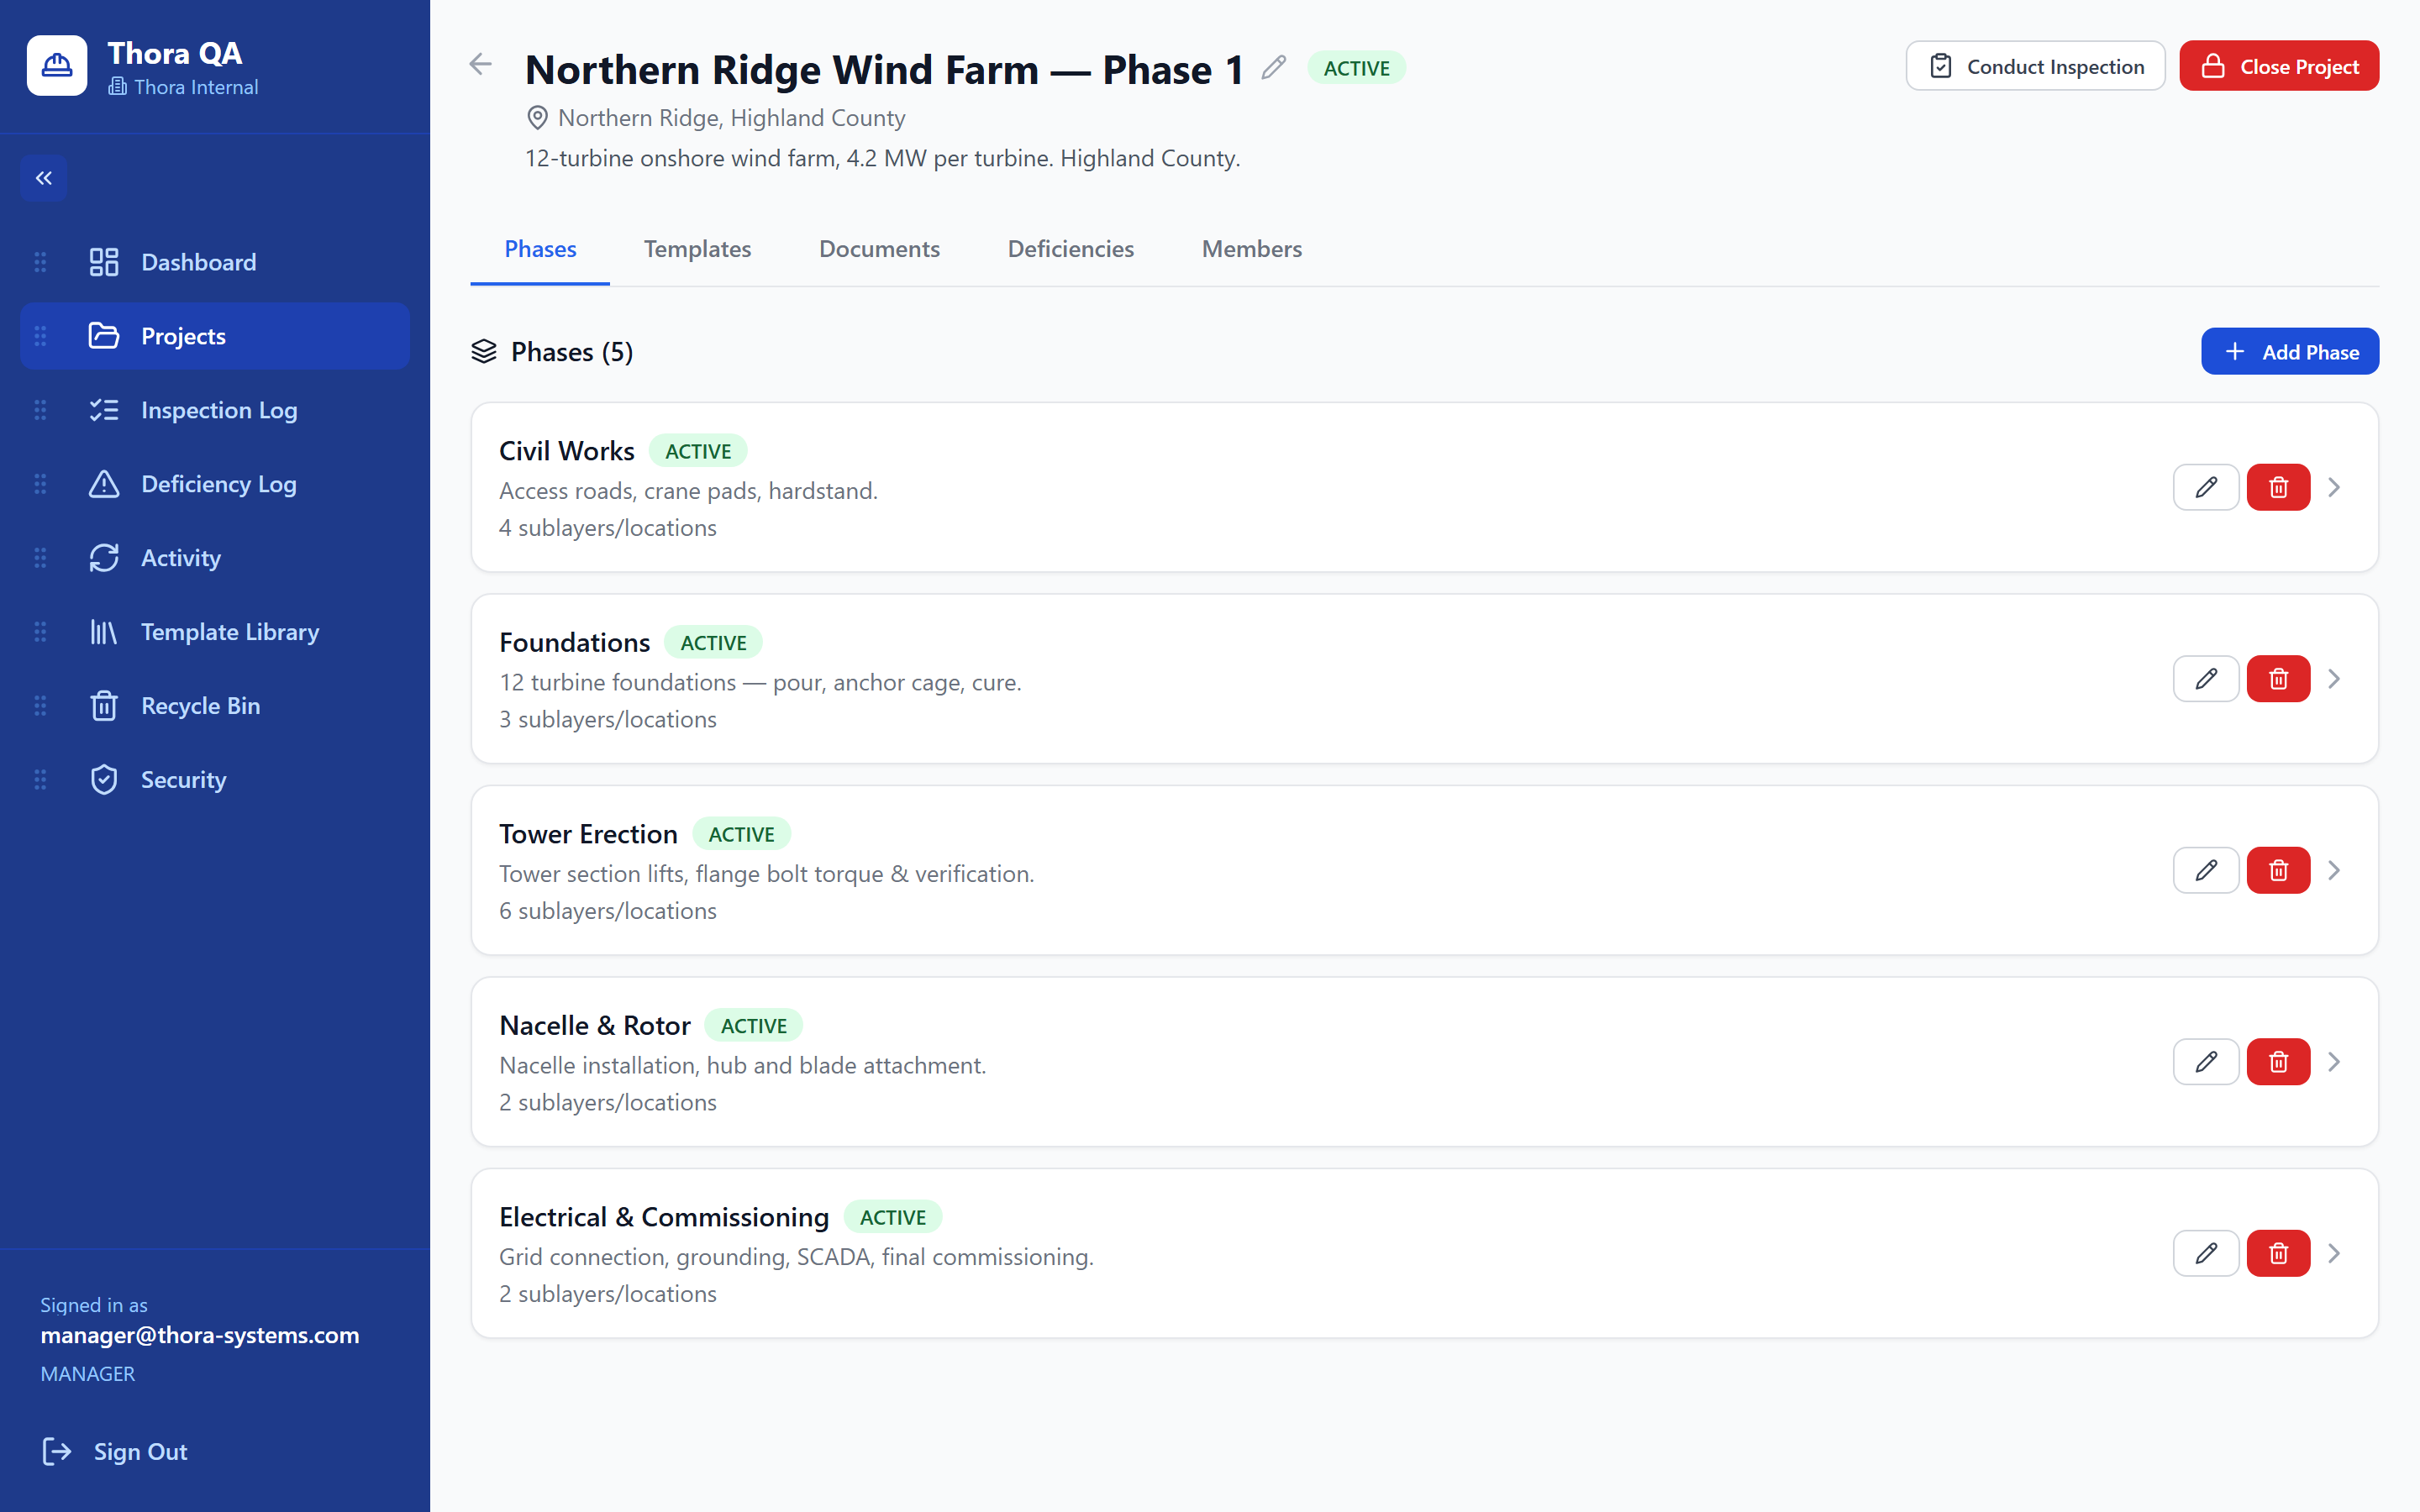
Projects in Thora mirror how the site is organised: Project → Phases → Locations. Get this structure right first — everything else hangs off it.
- Create the project with its name and details.
- Add phases — the major stages of the job, e.g. Civil Works, Foundations, Tower Erection, Electrical & Commissioning.
- Add locations inside each phase — the physical units you actually inspect: zones, floors, apartments, turbine sections. If an inspector stands in it, it is a location.
- Add your team to the project — inviting people and setting roles is admin-only. Inspectors only ever see the projects they are added to.
A useful rule of thumb: phases close from the bottom up. A phase is complete when its locations are complete, and the project when its phases are — so make locations as granular as the sign-off you will need at handover.
Build & assign templates
A template is a reusable inspection form — one per inspection type, e.g. “Tower Flange Bolt Verification” or “Waterproofing — Wet Area.”
- Create the template and name it the way the field talks about the inspection.
- Add the checks your scope requires — pass/fail line items, measurements with units, dates, notes, and photo requirements. Make photos required on the checks where evidence matters most.
- Assign the template to locations — every location that needs this inspection gets it. One template, forty locations, forty comparable records.
Keep forms short and in walk order.
Inspect in the field
For inspectors, a day in Thora looks like this:
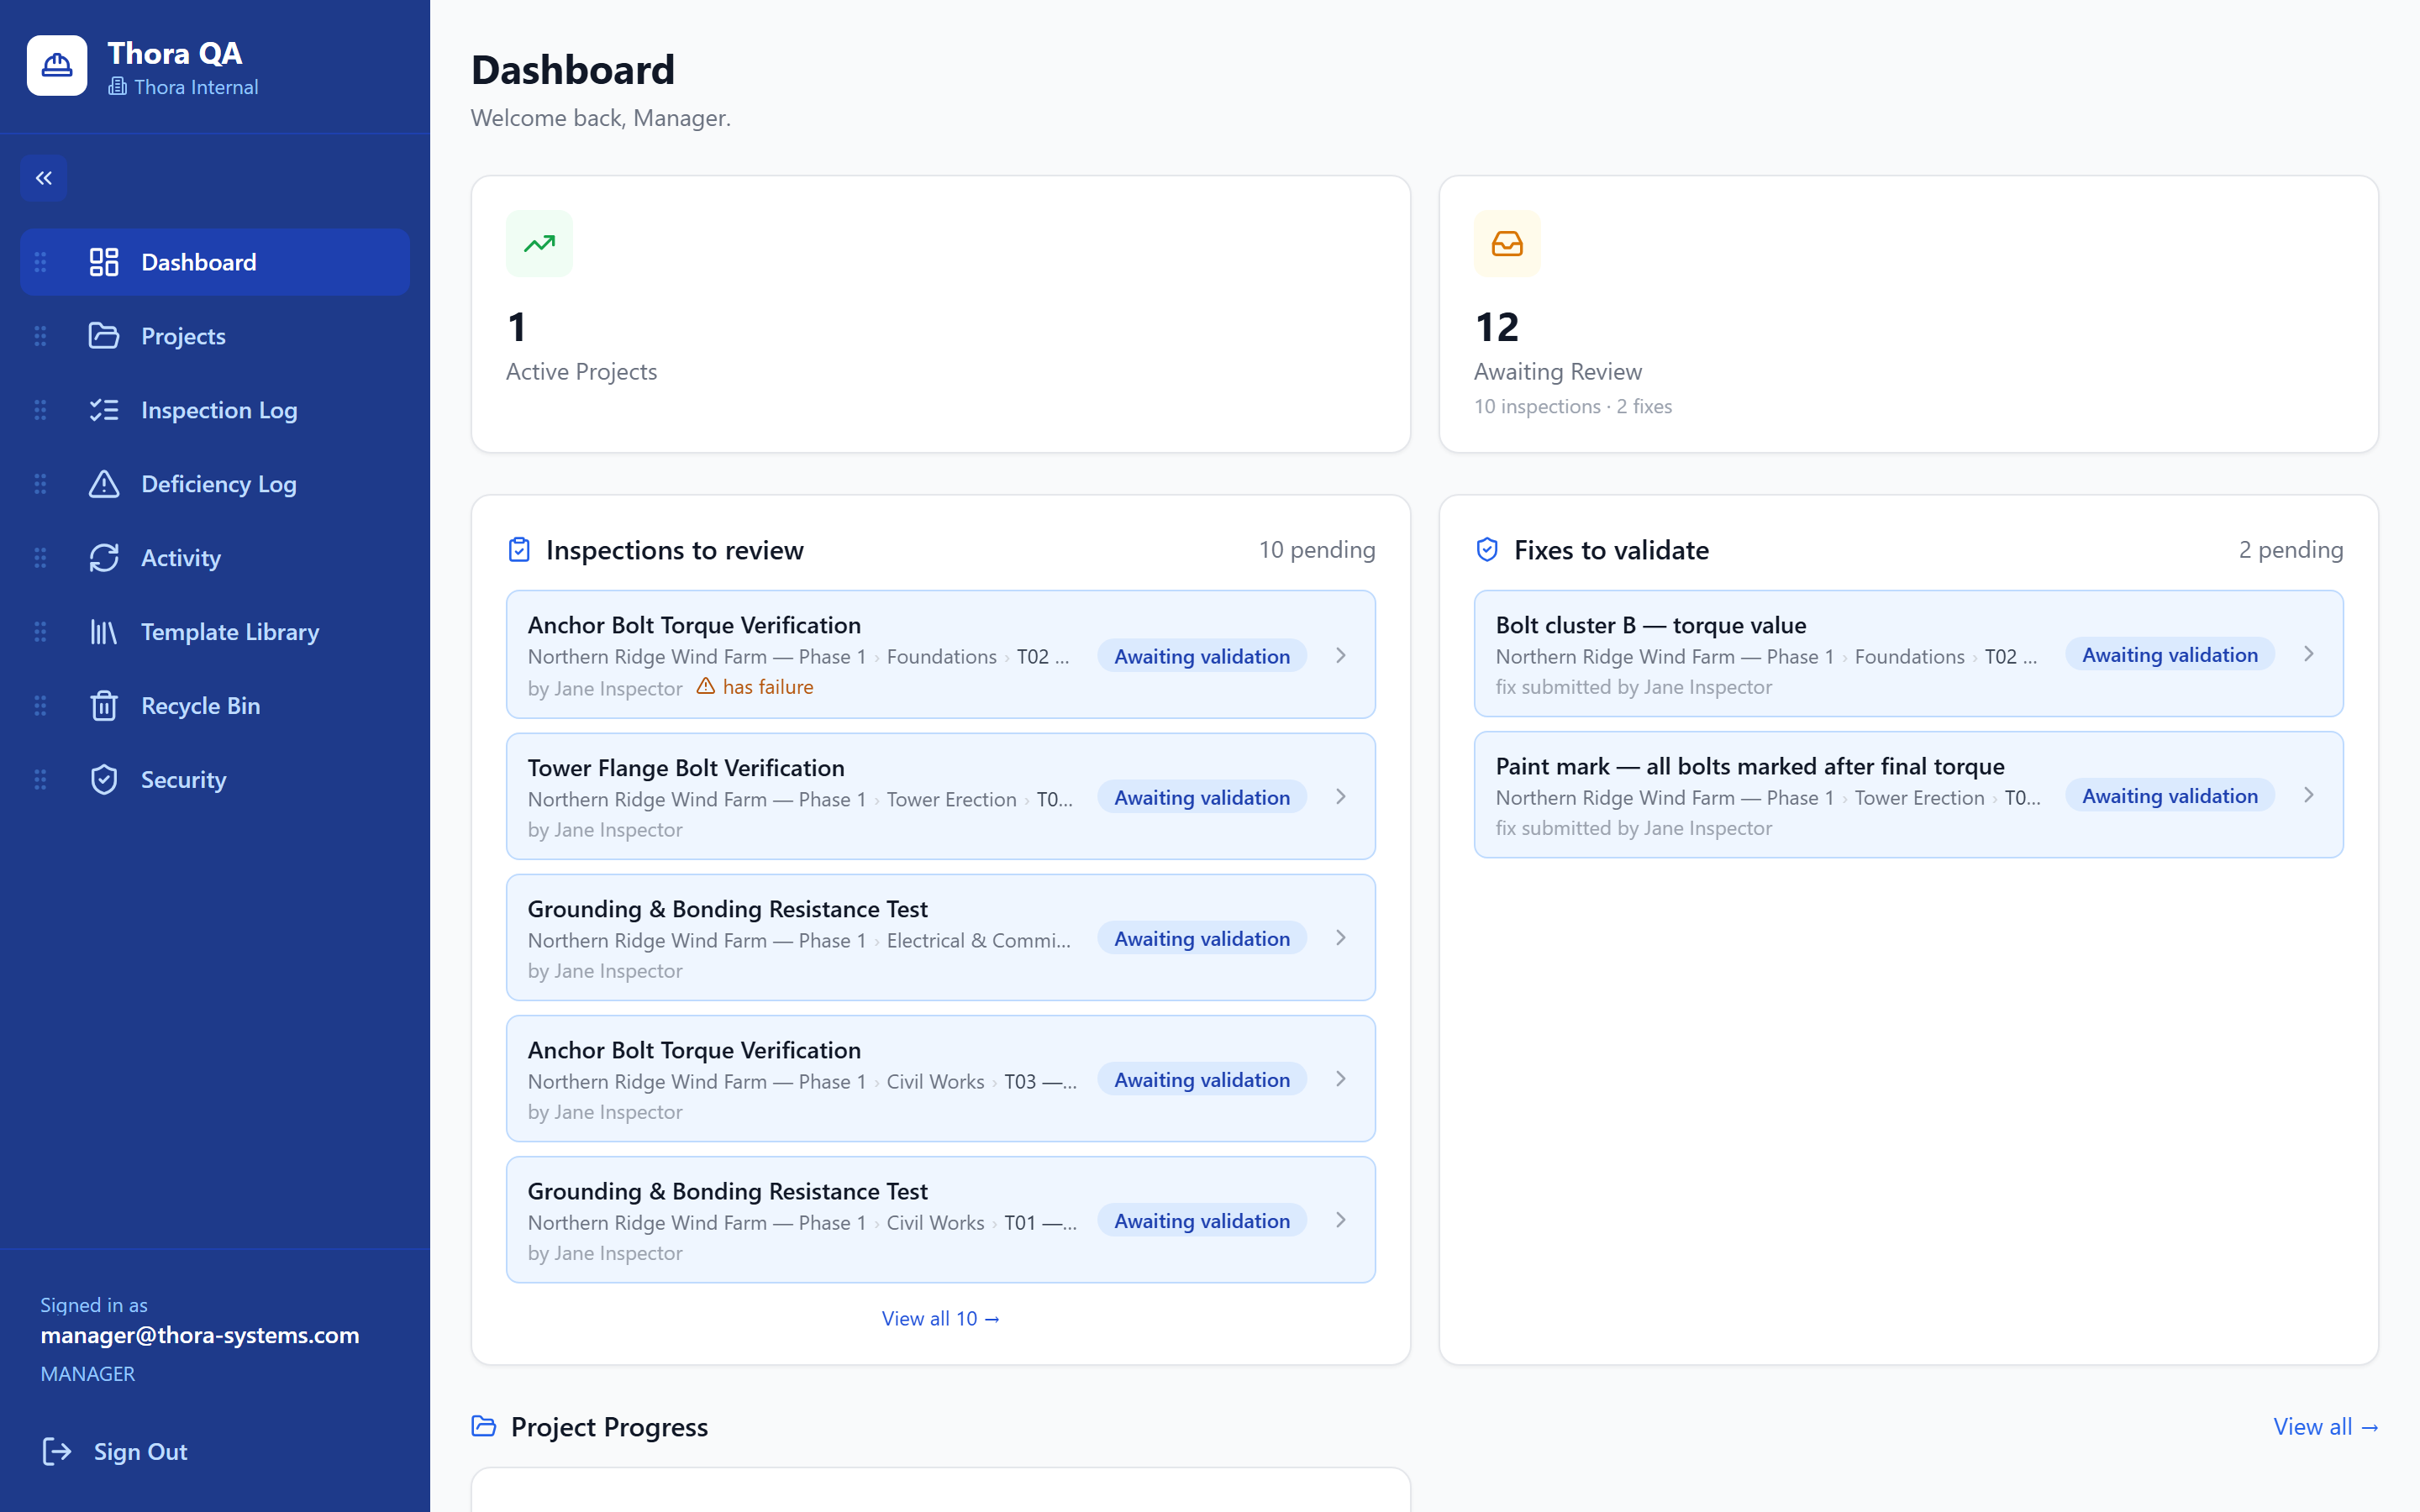
- Open your dashboard. It shows your assigned projects, your drafts in progress, and anything needing your attention.
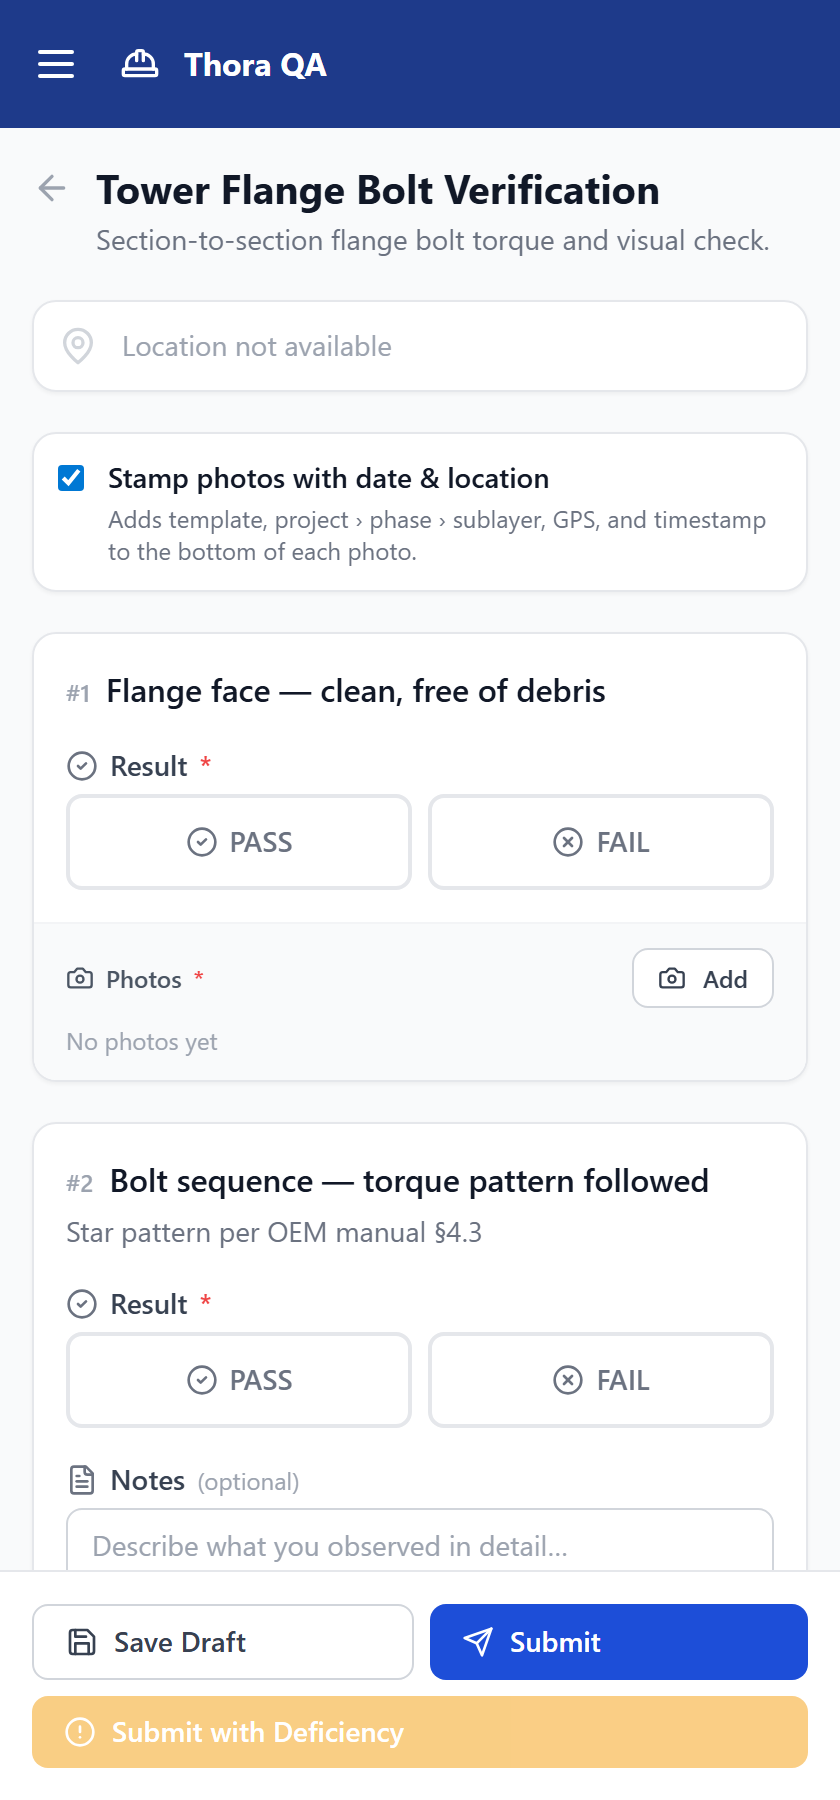
- Navigate to the location you are inspecting and open its form.
- Work through the line items in order — mark pass or fail, enter measurements, and capture photos directly on the line item they evidence.
- Submit when the form is complete. Your name, the time, and the location go with it automatically.
No signal? Keep working. The inspection saves on the device as a draft — photos included — and syncs on its own when the phone reconnects. Drafts are held on the device in a basement or a tunnel; finish the walk and let it catch up at the gate.
Deficiencies: report → fix → validate
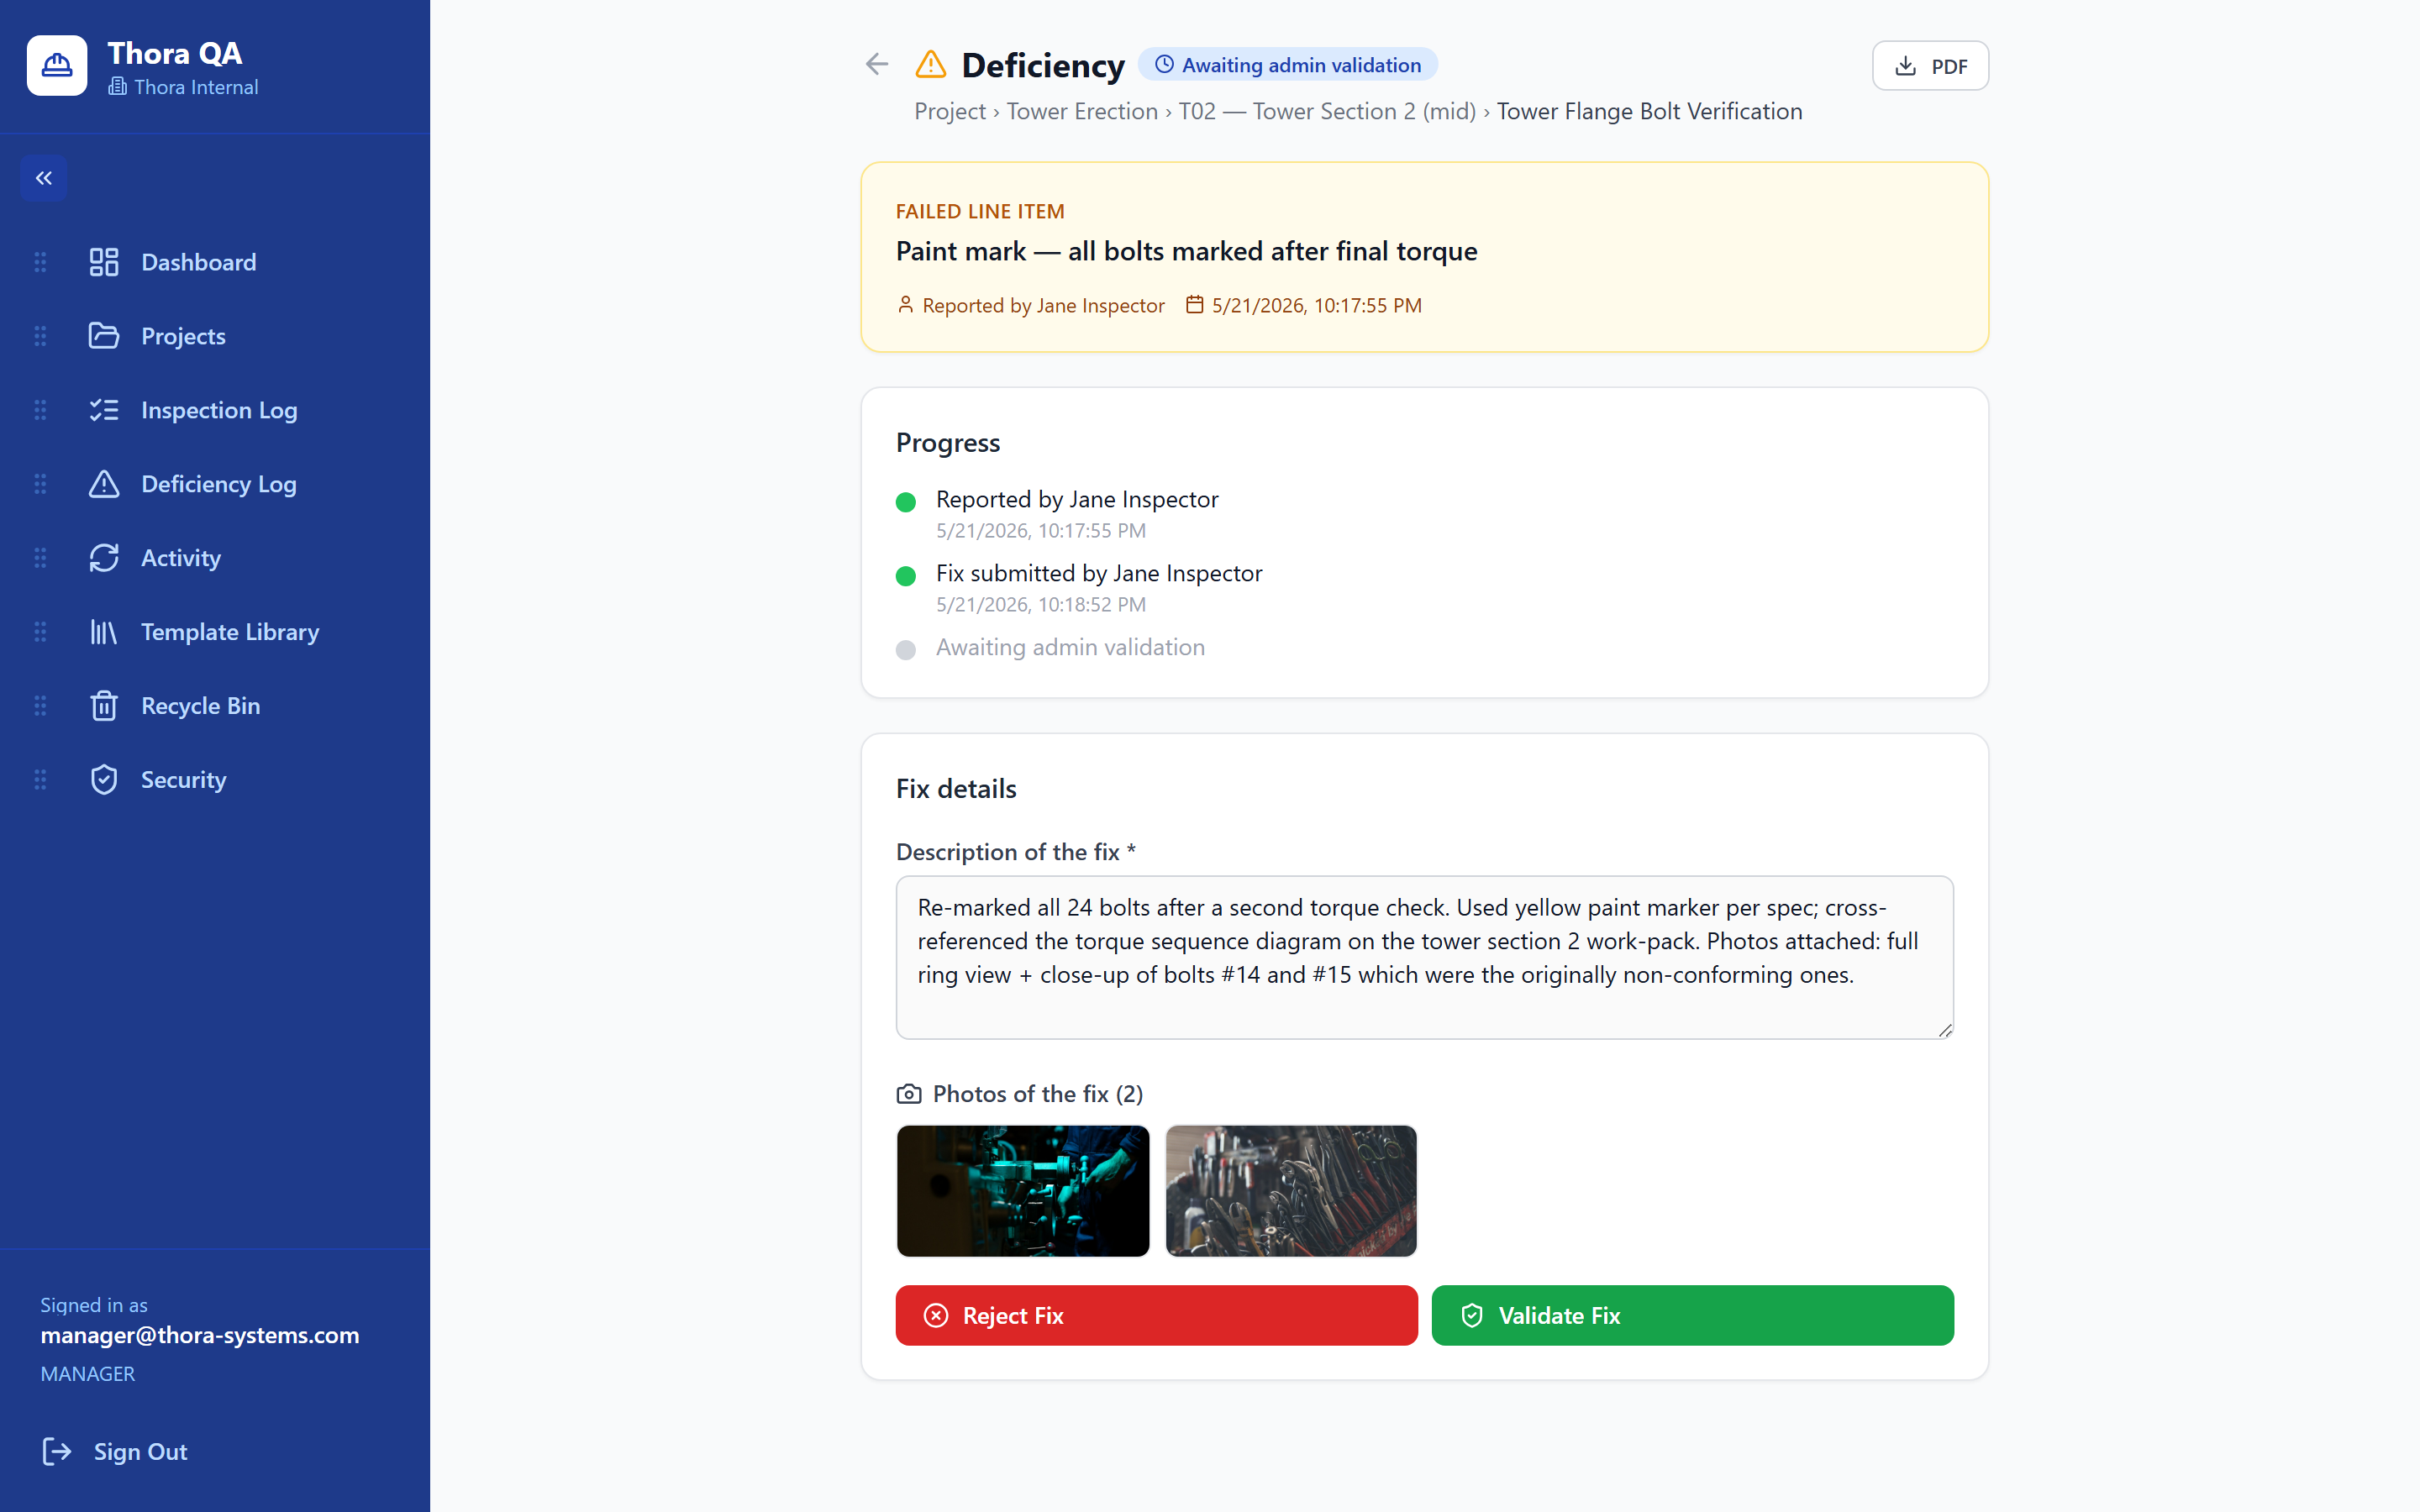
When a line item fails, Thora raises a deficiency — a tracked item that cannot quietly disappear. Every deficiency moves through three visible steps:
- Reported — the failed check, captured by the inspector with photo evidence of what was found.
- Fixed — the responsible party corrects the work and submits the fix with a short description and photos of the corrected state.
- Validated — an admin or manager reviews the fix against the evidence and accepts it on the record. If the fix does not hold up, it goes back for another pass instead of closing.
Nothing closes without a named person signing off, and every step carries its own timestamp and author. That is what makes the record dispute-ready afterwards.
Reports & closeout exports
The record you built in the field turns into deliverables in two ways:
- Inspection reports. When an inspection passes in full, its report is generated automatically — results, measurements, and photo evidence bound into one document.
- Project exports. At any point, export the inspection and deficiency logs to CSV and download the generated reports and documents — for handover, an audit, or your own records. A one-click full project archive is in development.
Admins and managers also see live progress per phase — how many inspections are in, what passed, and what is still open — without calling anyone.
Tips for field crews
- Photograph at the line item, not into the camera roll. A photo taken inside the form is attributed and filed with the record; one taken outside it is an orphan you will have to explain later.
- Trust the draft. Offline is normal, not an error. Finish the inspection; syncing is the app’s job, not yours.
- One inspection, one location. Resist summarising a floor in a single form — granular records are what make closeout a download.
- Fail honestly. A failed line item is not a problem; it is the system working. The deficiency loop exists so that finding issues early is cheap.
Getting help
Stuck, or something in your build looks different from this guide? Email support@thora-systems.com — messages reach the founding team directly.
Want your crews trained hands-on? Guided setup — templates built with you, crews walked through their first inspections — is included on every plan. See pricing or ask us during your walkthrough.